Raspberry PI Bare Metal Booting Up #
This is my new blog series on Raspberry PI Bare Bone coding. In this series, I will show you how to build a simple bare bone code in assembly for the Raspberry PI. We will start gradually add more features to our code.
Introduction #
The booting process of a Raspberry PI is quite different from that of a traditional PC. The Raspberry PI uses a unique bootloader that is stored in the GPU’s ROM. This bootloader is responsible for initializing the hardware and loading the operating system. I will not be doing anything with GPU bootloader as it is closed source binary blob and not documented. Instead, I will focus on the ARM CPU and how to get it up and running. But there are part of GPU Mailbox interface that we will be using to get the ARM CPU up and running. If you have read my previous blog posts on Raspberry PI Mailbox interface, you will be familiar with the concepts but I will explain them again here for completeness.
The Raspberry PI boot process can be summarized as follows:
- Power On: When the Raspberry PI is powered on, the GPU’s bootloader is executed.
- Load Bootcode: The bootloader loads the
bootcode.binfile from the SD card into the GPU’s memory. - Initialize Hardware: The bootloader initializes the hardware, including the SDRAM.
- Load Start.elf: The bootloader then loads the
start.elffile, which is the main firmware for the GPU. - Load Kernel: Finally, the bootloader loads the kernel image (e.g.,
kernel.img) into memory and transfers control to it.
I will be focusing on the last step, where we load our own kernel image and get it running on the ARM CPU. The code for the kernel will be written in ARM assembly language. In this first volume, we will cover the following topics:
- Setting up the development environment
- Writing a simple “Hello, World!” of embedded world - a GPIO toggle kernel
- Compiling the kernel
- Testing the kernel on the RaspberryPI
Setting Up the Development Environment #
To get started, we need to set up our development environment. We will be using a cross-compiler with 64 bit ARM support.
You can install the necessary tools on your Linux machine (Ubuntu 22.04 64 bit) using the following commands:
wget https://developer.arm.com/-/media/Files/downloads/gnu/14.3.rel1/binrel/arm-gnu-toolchain-14.3.rel1-x86_64-aarch64-none-linux-gnu.tar.xz
sudo tar -xvf arm-gnu-toolchain-14.3.rel1-x86_64-aarch64-none-linux-gnu.tar.xz -C /usr/local/
export PATH=$PATH:/usr/local/arm-gnu-toolchain-14.3.rel1-x86_64-aarch64-none-linux-gnu/bin
This will install the ARM cross-compiler, Make, and QEMU for testing on the Raspberry PI Zero 2.
Next, we need to create a directory for our project or clone the raptorOS repository which contains all my bare minimum files to get started.
mkdir rpi_os_bare_bone
cd rpi_os_bare_bone
git clone https://github.com/ph0en1xr3t/raptoros.git
cd raptoros
Writing a Simple GPIO Toggle Kernel #
Now that we have our development environment set up, we can start writing our kernel. Create a new file called kernel.s in the src directory and add the following code:
The code below is a simple ARM assembly program that toggles an LED on the RaspberryPI GPIO pin 18.
.equ   MPIDR_AFFINITY_MASK, 0x3
.equ   PERIPHERAL_BASE,   0x3F000000
.equ   GPIO_BASE,         (PERIPHERAL_BASE + 0x200000)
.equ   MAILBOX_BASE,      (PERIPHERAL_BASE + 0xB880)

.equ   GPFSEL1,           (GPIO_BASE + 0x04)
.equ   GPSET0,            (GPIO_BASE + 0x1C)
.equ   GPCLR0,            (GPIO_BASE + 0x28)
.equ   GPPUPPDN0,         (GPIO_BASE + 0xE4)

.equ   MBOX_READ,         (MAILBOX_BASE + 0x00)
.equ   MBOX_STATUS,       (MAILBOX_BASE + 0x18)
.equ   MBOX_WRITE,        (MAILBOX_BASE + 0x20)
.equ   MBOX_FULL,         0x80000000
.equ   MBOX_EMPTY,        0x40000000
.equ   MBOX_CH_PROP,      8

.section ".data"
.align 4

mbox_buffer:
    .int 8*4
    .int 0
    .int 0x00028001
    .int 8
    .int 0
    .int 3
    .int 3
    .int 0

.section ".text.boot"
.global _start

_start:
    mrs     x1, mpidr_el1
    and     x1, x1, #MPIDR_AFFINITY_MASK
    cbnz    x1, park_core

master_core_setup:
    ldr     x1, =_start
    mov     sp, x1

    ldr     x1, =mbox_buffer
    bl      mailbox_call
    b       gpio_setup

gpio_setup:
    ldr     x1, =GPFSEL1
    ldr     w2, [x1]
    bic     w2, w2, #(7 << 24)
    orr     w2, w2, #(1 << 24)
    str     w2, [x1]
    dsb     sy
    b       blink_loop

mailbox_call:
    add     x1, x1, #MBOX_CH_PROP
mbox_write_wait:
    ldr     x2, =MBOX_STATUS
    ldr     w3, [x2]
    tst     w3, #MBOX_FULL
    b.ne    mbox_write_wait
    ldr     x2, =MBOX_WRITE
    str     w1, [x2]
mbox_read_wait:
    ldr     x2, =MBOX_STATUS
    ldr     w3, [x2]
    tst     w3, #MBOX_EMPTY
    b.ne    mbox_read_wait
    ldr     x2, =MBOX_READ
    ldr     w3, [x2]
    cmp     w1, w3
    b.ne    mbox_read_wait
    ret

delay_loop:
    mov     x10, #0x1000
delay_inner:
    sub     x10, x10, #1
    cbnz    x10, delay_inner
    ret

blink_loop:
    mov     w1, #(1 << 18)

    ldr     x2, =GPSET0
    str     w1, [x2]
    dsb     sy
    bl      delay_loop

    ldr     x2, =GPCLR0
    str     w1, [x2]
    dsb     sy
    bl      delay_loop

    b       blink_loop

park_core:
    wfe
    b       park_core
Setting Up the Linker Script #
To link our assembly code, we need to create a linker script. Create a file called link.ld in the root directory of your project with the following content:
SECTIONS
{
    . = 0x80000;
    .text : { KEEP(*(.text.boot)) *(.text .text.* .gnu.linkonce.t*) }
    .rodata : { *(.rodata .rodata.* .gnu.linkonce.r*) }
    PROVIDE(_data = .);
    .data : { *(.data .data.* .gnu.linkonce.d*) }
    .bss (NOLOAD) : {
        . = ALIGN(16);
        __bss_start = .;
        *(.bss .bss.*)
        *(COMMON)
        __bss_end = .;
    }
    _end = .;

   /DISCARD/ : { *(.comment) *(.gnu*) *(.note*) *(.eh_frame*) }
}
__bss_size = (__bss_end - __bss_start)>>3;
Compiling the Kernel #
To compile the kernel, we will use the ARM cross-compiler. Create a Makefile in the root directory of your project with the following content:
CFILES = $(wildcard *.c)
OFILES = $(CFILES:.c=.o)
SFILES = boot.s
SOFILES = $(SFILES:.s=.o)
GCCFLAGS = -Wall -O0 -ffreestanding -nostdinc -nostdlib -nostartfiles -mstrict-align

CC = aarch64-none-elf-gcc
LD = aarch64-none-elf-ld
OBJCOPY = aarch64-none-elf-objcopy

all: clean kernel8.img

%.o: %.s
	$(CC) $(GCCFLAGS) -c $< -o $@

%.o: %.c
	$(CC) $(GCCFLAGS) -c $< -o $@

kernel8.img: $(SOFILES) $(OFILES)
	$(LD) -nostdlib $(SOFILES) $(OFILES) -T link.ld -o kernel8.elf
	$(OBJCOPY) -O binary kernel8.elf kernel8.img

clean:
	/bin/rm kernel8.elf *.o *.img > /dev/null 2> /dev/null || true
Now your project structure should look like this:
├── boot.s
├── link.ld
└── Makefile

0 directories, 3 files
Now, you can compile the kernel by running the following command in the terminal:
make
This will generate a kernel8.img file in the root directory of your project.
Testing the Kernel on the RaspberryPI #
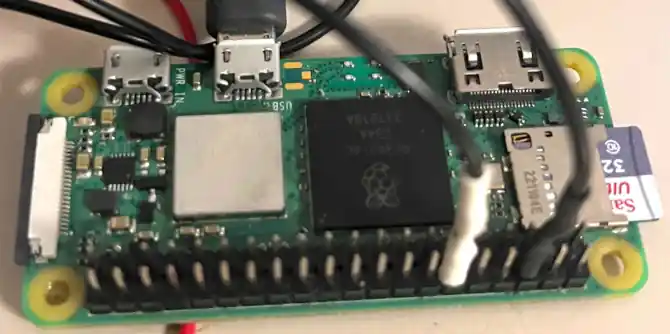
To test the kernel, you can use the same SDCard that you used to boot the RaspberryPI zero 2W. Copy the kernel8.img file to the root of the SD card. Replace the existing kernel8.img file on the SD card with the new one. Make sure that the SD card also contains the necessary boot files bootcode.bin, start.elf, etc. and that no other files are deleted.
Now, insert the SD card into the RaspberryPI and power it on. If everything is set up correctly, you should see the LED connected or Logic analyzer to GPIO pin 18 blinking on and off.
Explanation of the Code #
Let’s go through the code step by step:
- Constants and Memory Addresses: We define several constants for the peripheral base address, GPIO base address, and mailbox base address. These addresses are specific to the RaspberryPI hardware registers can be found in the BCM2835 ARM Peripherals documentation. The address varies depending on the RaspberryPI model for example the RaspberryPI Zero 2W uses
0x3F000000as the peripheral base address. All other addresses are calculated based on this base address.
.equ   MPIDR_AFFINITY_MASK, 0x3                        // Mask to get the core ID
.equ   PERIPHERAL_BASE,   0x3F000000                   // RaspberryPI Zero 2W
.equ   GPIO_BASE,         (PERIPHERAL_BASE + 0x200000) // GPIO base address
.equ   MAILBOX_BASE,      (PERIPHERAL_BASE + 0xB880)   // Mailbox base address

.equ   GPFSEL1,           (GPIO_BASE + 0x04)           // GPIO Function Select Register 1
.equ   GPSET0,            (GPIO_BASE + 0x1C)           // GPIO Pin Output Set Register 0
.equ   GPCLR0,            (GPIO_BASE + 0x28)           // GPIO Pin Output Clear Register 0
.equ   GPPUPPDN0,         (GPIO_BASE + 0xE4)           // GPIO Pull-up/Pull-down Register 0

.equ   MBOX_READ,         (MAILBOX_BASE + 0x00)        // Mailbox Read Register
.equ   MBOX_STATUS,       (MAILBOX_BASE + 0x18)        // Mailbox Status Register
.equ   MBOX_WRITE,        (MAILBOX_BASE + 0x20)        // Mailbox Write Register
.equ   MBOX_FULL,         0x80000000                   // Mailbox Full Flag
.equ   MBOX_EMPTY,        0x40000000                   // Mailbox Empty Flag
.equ   MBOX_CH_PROP,      8                            // Mailbox Channel Property
The mask is used to extract the core ID from the MPIDR register as shown below.
- Mailbox Buffer: Mailbox is needed as GPIOs are not enabled by default. We create a mailbox buffer in the
.datasection to communicate with the GPU. The mailbox buffer is used to request the GPU to enable the GPIOs.
Below is the sequence diagram describing mailbox message to enable GPIOs.

The value 0x00028001 is the request code to enable GPIOs. The payload consists of the GPIO pin number (18), the function (3 for output), and the value (3 to enable). The buffer is terminated with a zero. All messages are described in following github link Link
.section ".data"
.align 4

mbox_buffer:
    .int 8*4        // Total size of the buffer in bytes
    .int 0          // Request code
    .int 0x00028001 // Request to enable GPIOs
    .int 8          // Size of the payload
    .int 0          // Payload (GPIO 18)
    .int 3          // Payload (function 3: set GPIO 18 to output)
    .int 3          // Payload (value 3: enable GPIO 18)
    .int 0          // Padding for alignment
The mailbox buffer needs to be 16 byte aligned.
- Entry Point: The
_startlabel is the entry point of the program. It checks if the current core is the master core (core 0) and sets up the stack pointer.
section ".text.boot"                       // Boot code .text section
.global _start                             // Entry point can be anything for bare bone

_start:
    mrs     x1, mpidr_el1                  // Read the MPIDR register to get the core ID
    and     x1, x1, #MPIDR_AFFINITY_MASK   // Mask to get the core ID
    cbnz    x1, park_core                  // If not core 0, park the core

master_core_setup:
    ldr     x1, =_start                    // Load the address of _start
    mov     sp, x1                         // Set the stack pointer to the start address

    ldr     x1, =mbox_buffer               // Load the address of the mailbox buffer
    bl      mailbox_call                   // Call the mailbox function to enable GPIOs
    b       gpio_setup                     // Branch to GPIO setup
- Mailbox Call: The
mailbox_callfunction sends the mailbox buffer to the GPU and waits for a response. This is necessary to enable the GPIOs.
mailbox_call:
    add     x1, x1, #MBOX_CH_PROP // Add the channel property to the address
mbox_write_wait:
    ldr     x2, =MBOX_STATUS      // Load the address of the mailbox status register
    ldr     w3, [x2]              // Read the status register
    tst     w3, #MBOX_FULL        // Test if the mailbox is full
    b.ne    mbox_write_wait       // If full, wait
    ldr     x2, =MBOX_WRITE       // Load the address of the mailbox write register
    str     w1, [x2]              // Write the address of the mailbox buffer
mbox_read_wait:
    ldr     x2, =MBOX_STATUS      // Load the address of the mailbox status register
    ldr     w3, [x2]              // Read the status register
    tst     w3, #MBOX_EMPTY       // Test if the mailbox is empty
    b.ne    mbox_read_wait        // If empty, wait
    ldr     x2, =MBOX_READ        // Load the address of the mailbox read register
    ldr     w3, [x2]              // Read the response
    cmp     w1, w3                // Compare the response with the request
    b.ne    mbox_read_wait        // If not equal, wait
    ret
- GPIO Setup: The
gpio_setupsection configures GPIO pin 18 as an output by modifying the appropriate bits in the GPFSEL1 register. The configuration process is not that different from what we do in C language. We read the current value of the register, modify the bits corresponding to GPIO 18, and write the new value back to the register. I have covered it in detail in my previous blog post Link.
gpio_setup:
    ldr     x1, =GPFSEL1        // Load the address of the GPFSEL1 register
    ldr     w2, [x1]            // Read the current value of the register
    orr     w2, w2, #(1 << 24)  // Set GPIO 18 to output
    str     w2, [x1]            // Write the new value back to the register
    ret
    dsb     sy                  // Data Synchronization Barrier
    b       blink_loop          // Repeat the loop
- Blink Loop: The
blink_loopsection toggles GPIO pin 18 on and off with a delay in between. It uses the GPSET0 and GPCLR0 registers to set and clear the pin.
blink_loop:
    mov     w1, #(1 << 18) // Bit mask for GPIO 18

    ldr     x2, =GPSET0   // Load the address of the GPSET0 register
    str     w1, [x2]      // Set GPIO 18 high
    dsb     sy            // Data Synchronization Barrier
    bl      delay_loop    // Call the delay loop

    ldr     x2, =GPCLR0   // Load the address of the GPCLR0 register
    str     w1, [x2]      // Set GPIO 18 low
    dsb     sy            // Data Synchronization Barrier
    bl      delay_loop    // Call the delay loop

    b       blink_loop    // Repeat the loop
- Delay Loop: The
delay_loopfunction creates a simple delay by looping a fixed number of times. This is used to control the blink rate of the LED.
delay_loop:
    mov     x10, #0x1000     // Load a value for the delay
delay_inner:
    sub     x10, x10, #1     // Decrement the counter
    cbnz    x10, delay_inner // If not zero, continue looping
    ret
Final Tests and Conclusion #
After successfully running the kernel on the RaspberryPI and observing the LED blinking. Here is my setup with a logic analyzer to verify the GPIO toggling. One important point to note is that we always need to load 32 bit value into 32 bit register even if we are using 64 bit ARM CPU. So we use w registers for 32 bit operations.
str w1, [x2]
This has taken me lot of time to figure out as I was trying to use x registers for 32 bit operations which was not working.
The logic analyzer shows the GPIO pin 18 toggling between high and low states, confirming that our bare bone kernel is functioning correctly.